After writing my post about site definitions and web templates a lot of people have asked me whether you can use web templates to create site collections. The short answer is ‘yes, you can’. This post will walk through the steps of how to actually do that. In this post I will build a very basic web template, the point of the post is how to use web templates to create site collections. If you want more in-depth information on how to create a web template take a look at Vesa’s post.
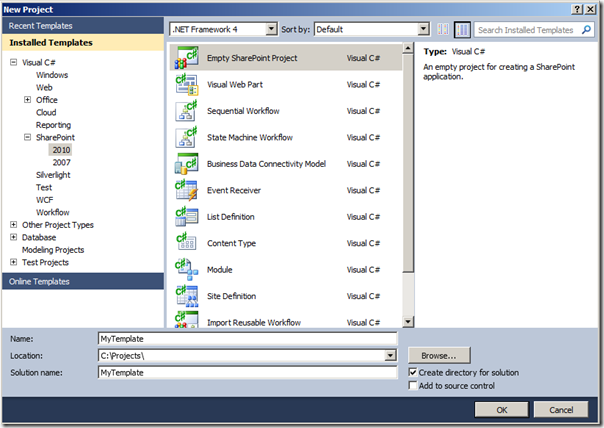
To create a web template we start by opening up Visual Studio. We will create an “Empty SharePoint Project”. I will call mine “MyTemplate” but you can obviously give it any name you like.
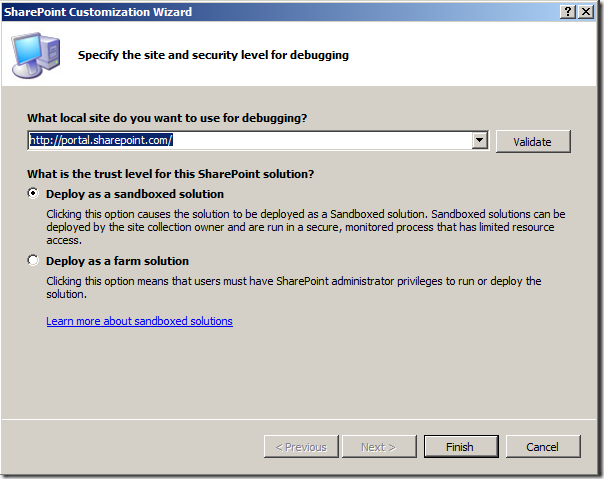
We will start of by deploying the solution as a sandboxed solution. Make sure the URL you choose to deploy the solution to actually points to an existing SharePoint site on the machine you are working on.
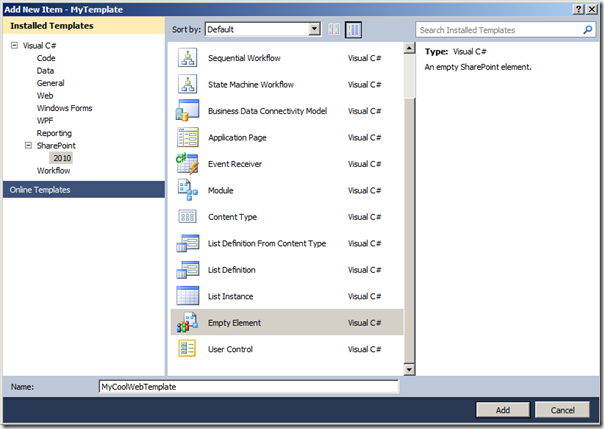
RIght-click on the project name in the solution explorer and select Add > New Item. Choose to add an Empty Element and give it a nice name. I will call mine “MyCoolWebTemplate”. I would advise you to choose a name that doesn’t contain any spaces.
Visual Studio will automatically add an Elements.xml file to your empty element. In here we can define the metadata of our web template. For those of you who have built site definitions in the past, this file will replace the webtemp*.xml file that a site definition uses. In order to allow us to use an elements file to specify a web template a new XML element was introduced with SharePoint 2010, the WebTemplate element. The WebTemplate element can contain a lot of attributes, but we don’t need all of them.
A site created using a web template will only use that web template while the site is being provisioned. After that the site will think it is based on the site definition and configuration listed in the BaseTemplateID, BaseTemplateName and BaseConfigurationID. These attributes have to be filled in for the web template to work properly. You should base your web template on an out of the box site definition that is as close to the web template you’ll be creating as possible. In my case I have chosen to use the standard Team Site site definition. This site definition won’t actually be used when the site is being provisioned, but it is what the site’s SPWeb.WebTemplate, SPWeb.WebTemplateID and SPWeb.Configuration will return if queried after the site has been created. I know this is confusing, but it’s important to wrap your head around it, in order to understand how web templates work.
A big plus of this approach is, that when at some point you want to migrate your site to SharePoint vNext you don’t have to rebuild your custom site definition for vNext. The site looks like it was created based on a standard site definition and modified using the UI afterwards. This means it should be easier to upgrade the site than if you had created your own custom site definition.
The Name attribute of the WebTemplate element will have to exactly the same as the name of your Empty Element in Visual Studio. If these two don’t match the web template won’t deploy properly.
The Title, Description and Display Category is what the user will see when he uses your web template to create a new site, so make sure those are clear and descriptive.
<?xml version="1.0" encoding="utf-8"?>
<Elements xmlns="http://schemas.microsoft.com/sharepoint/">
<WebTemplate BaseConfigurationID="0"
BaseTemplateID="1"
BaseTemplateName="STS"
Description="A cool site for cool people to share cool stuff"
DisplayCategory="Cool sites"
Name="MyCoolWebTemplate"
Title="Cool Site">
</WebTemplate>
</Elements>
The next step is to add an ONET.xml file to the empty element in Visual Studio. You can use the ONET.xml from a standard site definition as a base, but you will have to make some adjustments to work around the fact that not everything you can use in a site definition is supported in a web template. I will be using the ONET.xml from the standard Team Site. You can find this in the C:\Program Files\Common Files\Microsoft Shared\Web Server Extensions\14\TEMPLATE\SiteTemplates\sts\xml folder. If you copy the ONET.xml file into your empty element make sure the Deployment Type is set to ElementFile. Depending on how you copy it in there, it might set to NoDeployment by default.
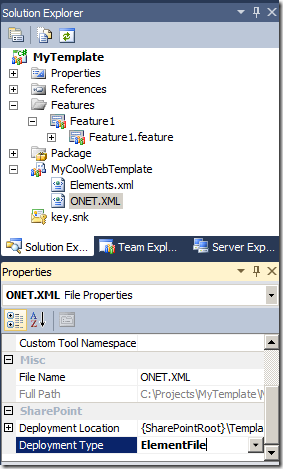
Now open up the ONET.xml file to clean it up.
- First step is to remove all configurations from it, except for one and give this configuration ID = 0.
- Remove the <Modules> reference element from the configuration
- Also remove all the <Modules> definitions from the ONET.xml
- If the FileDialogPostProcessor, ExternalSecurityProvider or ServerEmailFooter elements are used in the ONET.xml file remove those
You might have noticed that when you added the empty element to your project, Visual Studio automatically created a feature for you. If you started with an empty project the feature will be called Feature1. The empty element will be automatically added to the feature as well. In my case the title of the feature is MyTemplate Feature1. I will change this into “Cool Web Template Feature”. If you want to you can also add a description. By default, the scope of the feature will be Web. Adjust the drop down to change the scope of the feature to Site. Now rename the Feature1 file to something more descriptive. I will rename it to “Site-CoolWebTemplateFeature”. Notice how I’m prefixing the feature with the scope it will be deployed at. You don’t have to do that, but I find that if your solution grows a bit bigger it is helpful to do so.
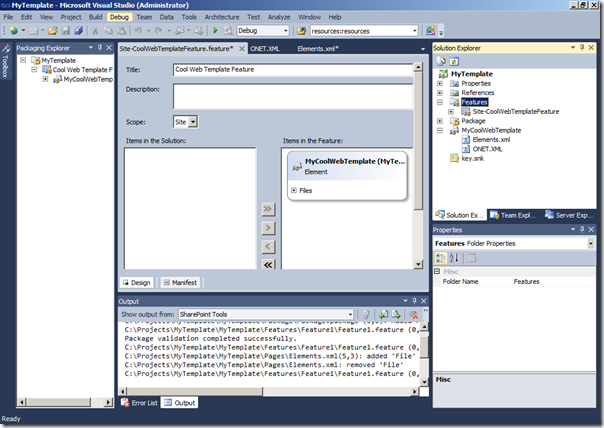
That’s it for now, we are ready to deploy our solution. Right-click your project’s name in the solution explorer and click Deploy. Visual Studio will now package your solution for you and because we chose to deploy it as a sandboxed solution it will deploy it to the Solution Gallery of the site collection you set at the deployment target when creating the project. Open up your browser and browse to that site. Go to Site Actions > Site Settings and click on the Solutions link in the Galleries section. The gallery should contain your sandboxed solution and it should be activated.

Now go back to Site Actions and choose New Site. You should now see our Cool Sites category and in it should be the Cool Site template.
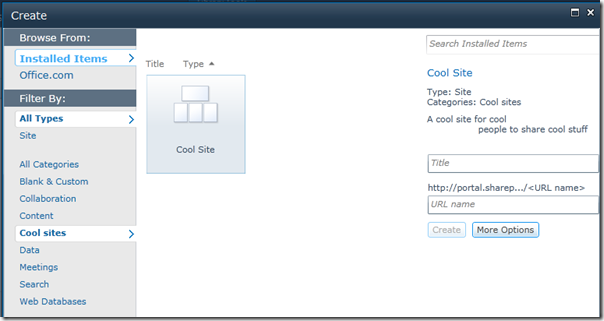
This confirms that we can now create a sub site based on our Cool Site template, but that wasn’t what we set out to do.
Open up Central Administration and go to Application Management > Create site collections. Fill in a title and a URL. You will notice that from the Template Selection control you can’t choose our Cool Site. That makes sense, because we deployed it as a sandboxed solution to a single site collection. That means it won’t be available when creating a new site collection from Central Administration. If we are using a hosted environment like Office 365 we will only be able to deploy sandboxed solutions, so we will have to make do with that. However we still might want to use our own templates for creating site collections.
Go ahead and select the Custom tab in the Template Selection control and choose < Select template later… >. Fill in a primary site collection administrator and click OK. A new site collection will be created.
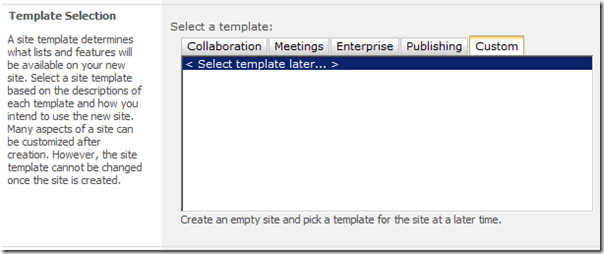
Browse to the newly created site collection. The site collection wasn’t fully provisioned, because we never selected a template for it. Because of that, browsing to the site will redirect us to the Template Selection page right away. Click on the Solution Gallery link on the page.
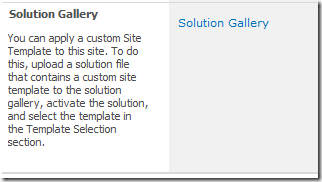
Select the Solutions tab in the ribbon and click on Upload Solution.
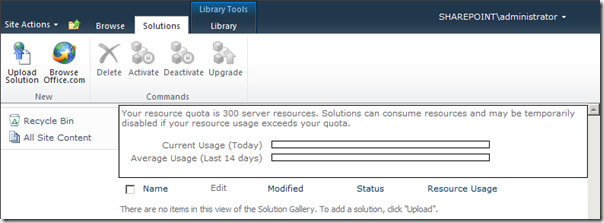
Click on the Browse button and select the .wsp file from the Debug or Release folder in the bin folder of your Visual Studio project. Activate the solution straight away.
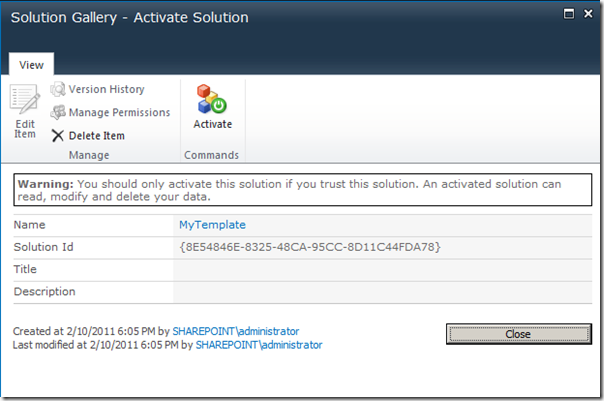
Use the ribbon to browse back to the site collection. You will now be able to select the Cool Site from the template selection control.
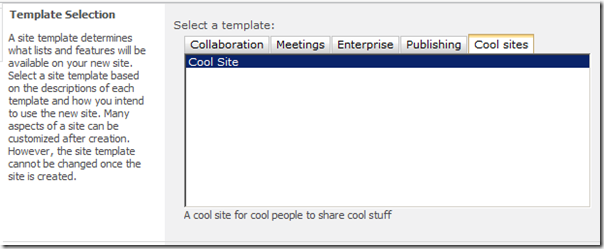
If you do so and click OK, the Cool Site template will be used to fully provision our newly created site collection and you will be able to browse to it.
This is one way to use web templates to create site collections. However if you are working in an on-premise SharePoint environment where you can deploy full-trust or farm solutions and you have to create multiple site collections based on the same web template you might want to consider another approach.
Go back to Visual Studio and first clean up by right-clicking on your project’s name in the solution explorer and choose Retract. This will deactivate the feature and remove it from the site collection you deployed it to. Retracting the solution using Visual Studio won’t remove it from the site collection where you uploaded it to manually.
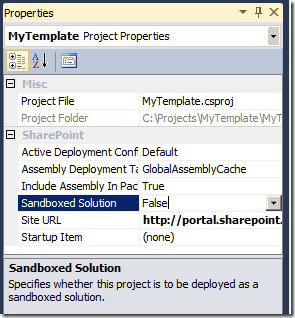
Next click on your project’s name in the solution explorer again and in the Properties pane change the value for Sandboxed Solution from True to False. Click Yes when you are challenged by a pop-up.
Now click on the feature you created earlier and change the scope from Site to Farm. If you want to be precise you should also rename the feature, to give it a farm prefix.
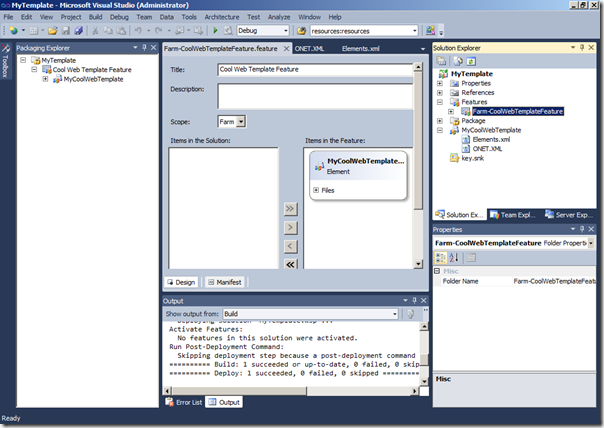
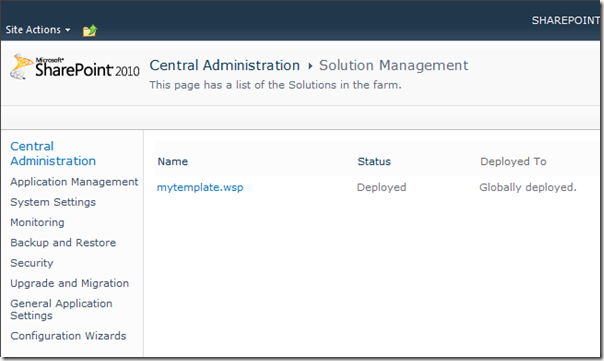
Deploy the solution again by right-clicking on your project’s name in the solution explorer and selecting Deploy. Visual Studio will re-package your solution and because we chose to deploy it as a farm solution this time it will deploy it to the Farm Solutions Gallery in Central Administration. Go to Central Administration and click System Settings > Manage farm solutions. The manage farm solutions page will show your solution and it will tell you that the solution has been deployed.
Now go back to Application Management > Create site collections and fill in a Title and a URL. You will now notice that you can select your web template straight away from the template selection control on the create site collections page.
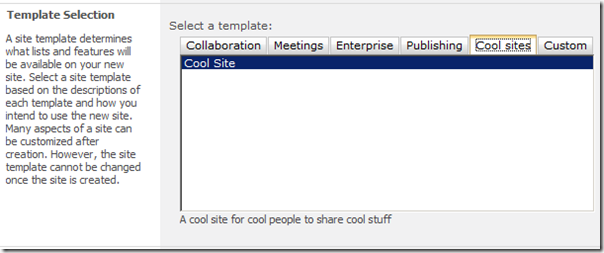
Basically from a user interface perspective the web template now behaves exactly like a site definition would. Not only can you create site collections based upon it, but because the web template was deployed using a farm scoped feature site owners will also be able to use the web template to create sub sites from any site collection in your SharePoint environment.
So there you have it. You can create site collection based on web templates, both in a hosted and in an on-premise environment, using either a sandboxed, or a farm solution.